Showing posts with label dessert. Show all posts

Making Cupcake Bouquets

I took a cupcake bouquet class at Le Dolci, as I was curious how cupcake bouquets are made. I found the experience fun, as the instructor explained us how to pipe three different flowers. She taught us how to make roses, carnation and daisies using the tear drop shaped tip. I have experience piping so I found it easy to follow the instructor, and had fun making these flowers.
After practicing for an hour on parchment paper, we got to decorate 12 mini-cupcakes that were pre-made for us. The buttercream icing was made with only butter and not shortening, so I found it was too quick to melt for my warm hands when I was piping :) 
I like that the icing only had butter and not shortening. Here is the recipe for the butter cream icing from Le Dolci, which I am looking forward to make at home to decorate cakes and cupcakes.
1 cup butter 
2 cups icing sugar 

Use room temperature butter and whip it for 2 minutes. Add the icing sugar slowly. 
It is optional to add a few drops of vanilla. For thinner consistency we can add water or milk a tsp at a time.
To make the cupcake bouquets, we need 
bamboo skewers 
clay pot 
craft flower arranging foam* 
knife and scissor 

*found in the dollar store and craft shops 
We cut up a piece of craft foam to fit into a clay pot so the cupcakes will have more balance when placed. The skewers were cut into 3 and placed in different heights. I pierced the cupcakes with a skewer lightly, but not all the way so it could be easily placed on the skewers.
I really liked how the bouquet looked after it was complete. I am glad that Le Dolci packs the goodies we make there to take home. My family thought it looked really pretty and enjoyed the bouquet of cupcakes. 
I usually think icing is just for the looks and not encourage my children to have a lot on their cakes, so I removed most of the pretty icing before they enjoyed the cupcakes.

I think it is always better and fun to learn a skill by having hands on experience. Le Dolci offers many different classes so we can learn to make cake pops, croissant, macaroons, cookie decorating truffles and more. Check out their website to take a look at the upcoming classes.
All rights reserved on photographs and written content Torviewtoronto © 2010 - 2013 unless mentioned. Please Ask First

Rice flakes sweet treats made with organic coconut sugar

This delicious sweet treat would be a wonderful quick snack to have anytime especially in the evening for tea time.

1/2 cup Rice flakes (flattened rice or beaten rice or poha or aval)
2 tbsp coconut sugar* (jaggery) to taste
2 tbsp grated fresh coconut to taste
warm water
Put the rice flakes into warm water and leave for about 5 minutes. Squeeze the rice flakes and put in a bowl, discard the water. 
Mix the rice flakes with the coconut sugar or jaggery and grated fresh coconut. Make it into bite-sized round shapes or serve it in individual dishes.
*Organic coconut sugar is a rich unrefined natural sweetener that is similar to brown sugar with a slight hint of butterscotch and caramel flavour. I have grown up with this delicious flavour has many  traditional preparations of dishes are made with coconut sugar that is well known as jaggery. 
The coconut sugar comes from the fresh nutrient-rich sap that is collected from tender coconut flower buds. The sap is gently heated in an open pan and boiled until it turns into granular form. This gluten free, healthy tropical favourite has no cholesterol and tastes delicious when included in beverages, cooking and baking. 
As it is made with natural ingredients there are no preservatives or artificial flavour or colour. The low glycemic qualities and high nutrient profile of the coconut sugar puts less stress on our blood sugar levels compared to highly refined white sugar. This Grace Coconut Sugar 500g jars are priced at $6.99 and is available in the international aisle at Loblaw’s, No Frills, Metro, Food Basics, Sobeys, Freshco, Walmart, Longo’s, Highland Farm and local ethnic store.

All rights reserved on photographs and written content Torviewtoronto © 2010 - 2013 unless mentioned. Please Ask First

Cookies for Spring

cookies for spring
7 tbsp butter at room temperature
1 egg
1 1/4 cup flour
Callebaut Crispearls* or chocolate chip desired amount optional

Beat the butter, egg and then add in the sugar with an electric mixer. Add the flour and mix with a wooden spoon to make a soft dough. Then mix in the chocolate chips or Callebaut Crispearls.  
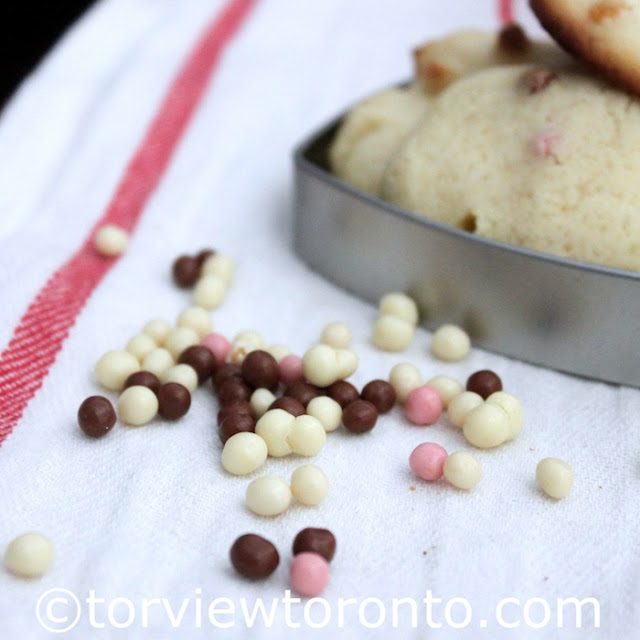
*Callebaut Crispearls are tiny toasted biscuit kernel coated with chocolate.
Callebaut Crispearls
Chill the dough in the fridge for about 1/2 hour before making 16 balls from the dough. Place the cookie balls in a lined baking sheet and flatten it about 1/4" thick before baking in a preheated 350F oven for 8 to 10 minutes until it is golden.  
Cookies will slightly harden after it cools on a wire rack so don't over bake as it might burn on the bottom.  This recipe is adapted from here.
cookies for spring
All rights reserved on photographs and written content Torviewtoronto © 2010 - 2013 unless mentioned. Please Ask First

Chocolate Bonbons

This recipe for Chocolate Bonbons (alcohol free) was learned during a media event that I attended at Bonnie Gordon college in Toronto.   
345g Cacao Barry Mexique dark chocolate*
250g 35% cream
60g butter
55g honey
80g hazelnut paste

Heat cream, hazelnut paste, butter and honey until it reaches 65C.
Place the chocolate in a bowl then pour the cream mixture over the chocolates.  Allow it to sit for a few seconds then stir until it is smooth. Cover the ganache with a saran wrap in contact until it sets.  
Scoop the mixture into balls and allow it to firm up for at least 2 hours.  The instructor placed the ganache inside a bag and piped it.
This step of placing a hazelnut in the middle before making a ball is optional.
After it sets, we can make it into balls.

Using gloves roll the balls and leave it aside to dip each truffle into tempered chocolates then it can be optionally rolled in cocoa powder, chopped nuts, shredded coconut or icing sugar.
* I learned about different types of chocolates and how to temper chocolates in the microwave without burning it, check out this post for more details.  This is a video I took when the instructor at Bonnie Gordon College was tempering chocolates.

All rights reserved on photographs and written content Torviewtoronto © 2010 - 2013 unless mentioned. Please Ask First

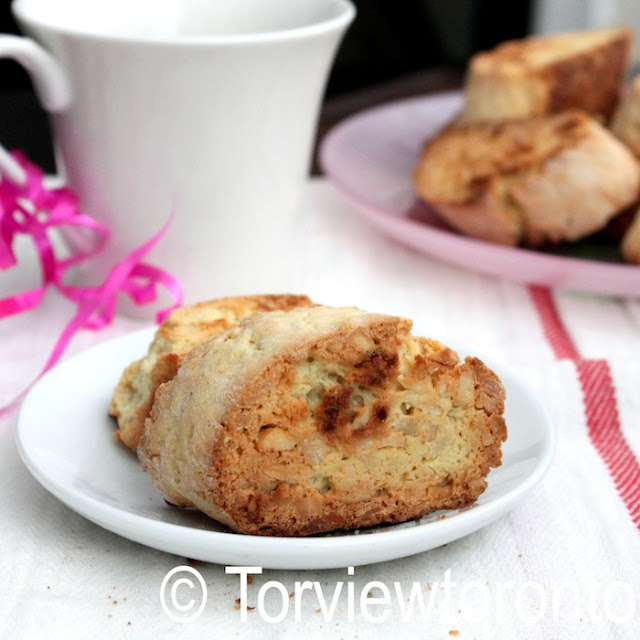
Almond Biscotti

almond biscotti
1 cup whole almonds skinned
1 1/2 cups flour
1/2 cup vanilla flavoured sugar
1 tsp baking powder
1/2 tsp salt
2 eggs 
4 tbsp unsalted butter melted

Melt the butter in a small pan over low heat until it melts and leave it aside to cool.  

Remove the skin of the almonds by soaking it in warm water for a few minutes and it will come out easily.  Spread the almonds on a baking sheet and bake in a 350F for 5 to 10 minutes until slightly coloured, toss halfway.  Allow the almonds to cool and then chop it coarsely.

Sift the flour with baking powder and salt into a big bowl.  Stir the sugar and chopped almonds into the flour.  In a separate bowl whisk the eggs and melted butter then add it to the flour mixture.  

Use your hands and bring the ingredients together to form a dough. Turn the dough onto a floured work surface and make 2 log shapes each about 8" long.  Place the logs on a baking sheet and bake in the middle rack of a preheated 350F oven for 20 minutes.  

Remove the logs from the oven and cool slightly then transfer it to a cutting board.  Use a serrated knife and then cut the logs diagonally into 1 1/2" to 2" thick slices.  Put the biscotti on a baking sheet and bake for 10 minutes, then flip and bake for another 5 minutes.  

Cool the biscotti on a wire rack to let it harden.  To store keep the biscotti in an airtight container for over a week.

The biscotti can also be frozen, by placing the biscotti on a baking sheet and freeze until it is solid then transfer it to a freezer bag.    

This recipe is from the DK illustrated step-by-step baking book.  I really like this book because of its detailed explanations and photographs. This book gives 80 classic recipes and has about 240 variations for these classics.  We can use the details and step-by-step photographs from the classic recipes to build on different variations.  The book covers a huge range of sweets and savouries such as tarts quiches, pies, breads, cakes, cookies, meringues, soufflés and a variety of party desserts for special occasions.  

All rights reserved on photographs and written content Torviewtoronto © 2010 - 2013 unless mentioned. Please Ask First

Healthy sweet moong dal snack or susiyam

Filling
1 cup split moong dal or mung bean *
1 1/2 cups water or more to cook the dal
1/2 cup fresh coconut shredded
1/2 cup grated jaggery or brown sugar to taste
1/4 tsp cardamom powder
*Instead of moong dal we can use split chickpeas or channa dal.  Adjust the amount of jaggery and coconut to taste.
Cook the dal until it is tender enough to mash, don't over cook the dal as it will become soggy and will be hard to form the ball shape.  Mix the dal with the coconut, jaggery and cardamom then make it into balls.
Batter
1 cup flour
1/8 tsp salt
1/8 tsp turmeric
coconut milk or water to make the batter

Mix the batter ingredients in another bowl to make a thick batter.

Coat the dal balls in the thick batter and fry in hot oil without overcrowding the pan until it becomes golden in colour.  
Serve warm or at room temperature as a snack.    
All rights reserved on photographs and written content Torviewtoronto © 2010 - 2013 unless mentioned. Please Ask First

Brownies with Rice Krispies


Happy Holidays!

These brownies with Rice Krispies are delicious and easy to make.

1 1/2 cups Rice Krispies cereal crushed
1/2 cup vanilla flavoured sugar  
1/4 cup flour
1/8 cup cocoa
pinch salt
pinch baking soda
1/4 cup vegetable oil
2 eggs
1 tbsp milk

Mix crushed cereal, sugar, flour, cocoa, salt and nuts.  Then add oil, eggs and milk.  Mix until combined and then spread evenly in a greased 8" x 8" baking pan.
Bake at 350F for about 15 minutes until a skewer inserted in the centre comes out clean.  Do not over bake.  Cool completely on a wire rack before cutting into squares.  
Store in a tight covered container at room temperature.  This recipe is slightly adapted from this site.

This holiday season Kellogg's Rice Krispies cereal has teamed up withe Lisa Sangeuedolce, a top Canadian cake decorator to create dazzling homemade gift ideas on a tiny budget.  Lisa's signature Kellogg's Rice Krispies cereal holiday ornaments put a fancy twist on Rice Krispies square.  Join Kellogg's on Facebook and see a variety of ideas to make delicious treats.


All rights reserved on photographs and written content Torviewtoronto © 2012 unless mentioned. Please Ask First

Gingerbread cookies


3 cups flour
3/4 tsp baking soda
1/2 tsp salt
2 tsp ground ginger
1 tsp ground cinnamon
1/4 tsp ground cloves
1/4 tsp ground nutmeg
1/2 cup unsalted butter at room temperature
1/2 cup sugar
1 egg at room temperature
2/3 cups molasses

We can use a paddle attachment in the stand mixer or hand mixer to make the dough.
Beat butter till it is creamy, add sugar and beat till the mixture is light and fluffy.  
Add the egg and beat.  
Spray the container with oil spray before measuring molasses so it doesn't stick to the measuring cup.  Then add the molasses to the mixture and combine.
Add the sifted dry ingredient 1/3rd at a time to the wet mixture.  After adding and mixing all the flour, gather the dough into a ball and cut it into two parts before covering it with a plastic wrap.  Leave the dough in the fridge to chill overnight or until it is firm so it can be easily rolled.

Flour the surface, rolling pin, cookie cutters and hands well with flour and roll the dough about 1/2" thick.  Keep turning and lifting the dough so it doesn't stick.
Prepare a tray with parchment paper and butter before placing the cut shapes.  Space about 1"between the cookies and leave the tray in the fridge for about 10 minutes before baking.  Bake in a preheated 350F oven for 8 to 10 minutes.  The cookies should barely brown around edges if baked too much it will become too crispy.  Cool completely on a wire rack before decorating.
The cookies will stay well covered for up to two weeks.  This Gingerbread cookies recipe is adapted from Joy of Baking.  Here is how my children helped bake and decorate these cookies.  
All rights reserved on photographs and written content Torviewtoronto © 2012 unless mentioned. Please Ask First

Milk cakes from the Bengali Five Spice Chronicles

This recipe for milk cake or kalakand is from the book Bengali Five Spice Chronicles.  My family enjoyed the flavour of this delicious dessert, which as the author mentions is a cross between cheesecake and milk fudge.  
1 can (14oz) evaporated milk
1 1/2 cup ricotta cheese
3/4 cup milk powder
3/4 cup sugar
2 tbsp ghee or clarified butter + 1/2 tbsp for greasing the dish
1/2 tsp cardamom powder
3 tbsp coarsely chopped pistachios


Put the evaporated milk, ricotta cheese in a pan and bring to a simmer.  Continue cooking the mixture on low heat for about 20 minutes, stirring it frequently until the mixture thickens considerably.

Add the milk powder, sugar and continue cooking until the mixture has a soft fudge-like consistency for about 20 to 30 minutes.
Mix in the 2 tbsp ghee and cook for another 3 to 4 minutes.
Grease an 8" or 9" dish and pour the cheese mixture.  Sprinkle the cardamom powder and pistachios over the mixture and let it cool.  I left it in the fridge to solidify before cutting the cake into 2" squares, we can also cut into any desired shape before serving it cool.
This book Bengali Five Spice Chronicles is written by Rinku Bhattacharya.  The book explores the cuisine of Eastern India and has over 180 recipes that are seperated into 13 parts such as rice & breads, lentil, vegetarian, egg dishes, fish, poultry, chutneys, drinks, snacks, sweets etc.  The book is full of delicious recipes and there are a few pictures of the dishes in the middle of the book. 
I like the explanations given by the author about different spices/seeds.  I also liked reading about the author and her influences that led to write this book.  

I find it interesting to read about other cultures and traditions, so I enjoyed reading the history of Bengali cuisine in the beginning of the book.  I thought it was interesting that Bengalis eat rice with different vegetables and then eat non-vegetarian food such as fish in the end, because we tend to eat it together or in the opposite way by eating non-veg first then with rice and vegetables :) 


Giveaway:
If you are in Canada or US and would like to win a copy of this book Bengali Five Spice Chronicles please enter through the rafflecopter below before December 15th.
Update: The winner is Tina


All rights reserved on photographs and written content Torviewtoronto © 2012 unless mentioned. Please Ask First

Pineapple cheesecake

Crumb
1 tbsp butter
3/4 cup graham wafers crumbs

Prepare a 8" springform pan with nonstick cooking spray.
Combine the softened butter and crumbs, then press into the bottom of the pan and freeze until the filling is ready.

Filling
1/4 package light cream cheese softened
1 cup cottage cheese
1 1/2 cup sugar
1/4 cup cornstarch
4 egg whites
1 tsp vanilla
14 oz crushed pineapple can well drained
1 cup drained yogurt*

*Drain the yogurt overnight in the fridge by placing it in a sieve lined with a paper towel over a bowl.
Combine and beat the cream cheese and cottage cheese until it is smooth.  Then beat in the sugar and cornstarch.  Add the yogurt and then stir in the crushed drained pineapple.  
Pour the batter into the frozen crust.

Bake in a 325F preheated oven for about 75 minutes until the sides are nicely brown and it is puffy in the centre.  
Turn the heat off and leave the oven door open halfway to let the cheesecake cool for about 1 to 1 1/2 hours inside the oven.  Then chill the cake for at least 4 hours or overnight before serving.
This recipe is adapted from a magazine clipping, not sure about the name of the magazine.

All rights reserved on photographs and written content Torviewtoronto © 2012 unless mentioned. Please Ask First
Plum crumble cake

plum crumble cake
For the cake
2 cups flour
3/4 to 1 cup vanilla infused sugar *
2 eggs
1 tsp baking powder
3/4 cup butter
plums to cover the cake


*It depends on the sweetness of the plum, I used about 8 plums with pit removed and cut in half.

Melt the butter and cool.  Sift flour and baking powder together, then add the sugar and eggs.  Rub together using the fingers then add the melted butter and form a dough.  Cover the smooth dough with a plastic wrap and cool in the fridge for an hour.


For the crumble

3/4 cup flour
1/4 cup sugar
1/4 cup butter
1 1/2 tsp cinnamon ground
Combine everything by rubbing the ingredients between the fingers to get a coarse texture.


Prepare a 13"x9" glass baking pan with baking paper and press the chilled dough evenly.  Press the tops with the halved, pitted plums.  Cover the cake with the crumble.  Bake the cake at 350F for about 40 to 50 minutes.  When the cake is tested with a skewer and it comes out clean, remove from the oven, cool and then cut to serve.

plum crumble cake
This recipe is adapted from here.
All rights reserved on photographs and written content Torviewtoronto © 2012 unless mentioned. Please Ask First

Golden sheet cake with buttercream icing

Eid Mubarak everyone.  Here is a golden sheet cake recipe I made for Eid.  The recipe is adapted from The Smitten Kitchen Cookbook.

12 tbsp (170g) unsalted butter at room temperature
2 3/4 cup (345g) flour
1/4 cup (30g) cornstarch
1 1/4 tsp baking powder
1/2 tsp baking soda
3/4 tsp salt
1 1/2 cups (300g) sugar *
1 1/2 tsp vanilla extract ** 
3 large eggs at room temperature
1 1/2 cup (355g) buttermilk well shaken

*I measured all ingredients in a weighing scale and reduced the amount of sugar by about 2 to 3 tbsp; just because my family doesn't like cakes that are too sweet.  Next time I will be reducing the butter by a couple of tbsp as well.
** I used vanilla infused sugar and omitted the vanilla extract.

Cream the butter and sugar till pale and fluffy then add vanilla if using.  Add eggs to this mixture one at a time beating well after each addition.  Add the buttermilk until just combined.
Mix flour, cornstarch, baking powder, baking soda, salt in a bowl, then sift it before mixing it into the butter sugar mixture in three additions until it is just incorporated. 
Spread the batter evenly in a 9"x13" baking pan prepared with parchment paper that is coated with butter or cooking spray or muffin tray (makes 24).  
Bake at 350F for 30 to 40 minutes until the cake tested with a skewer comes out clean.  Cool the cake in the pan on a rack for 10 minutes then discard the parchment paper and cool completely for about an hour before frosting the cake with buttercream icing.

The Smitten Kitchen Cookbook is written by food blogger, Deb Perelman.  Deb started her kitchen adventure in her tiny kitchen in Manhattan and documented it in her blog Smitten Kitchen.  She has adapted her recipes for the everyday cook, as the recipes use less time to prepare, few  ingredients and costs less.  This cookbook has over 100 recipes that are easy to follow, which is separated into breakfast, salads, sandwich/tart/pizzas, vegetarian dishes, non-vegetarian dishes, sweets and party snacks/ drinks.  
I liked reading the stories that came with each recipe that accompanies delicious pictures.  
I will be having brunch with Deb, the author in the middle of November; so if you have any questions or comments please email me or leave a comment on this post.
All rights reserved on photographs and written content Torviewtoronto © 2012 unless mentioned. Please Ask First

Chocolate Mug cake with Alfa One Rice Bran Oil


Alfa One Rice Bran oil is a versatile nutritionally balanced oil that can be used for all types of cooking.  It is created from bran and germ found in the husks of Thai rice.  This oil has been around for decades in Asian countries.  It has a natural light, clean taste with a mild nutty flavour.  This Rice Bran oil can be used for frying, barbecuing, grilling, stir-fries and non-stick baking.  It has a higher smoking point and lower viscosity so the food cooks fasters and evenly without absorbing a lot of oil, so we can use less oil.  The oil lets other ingredients shine and does not overpower because of its ultra-mild flavour.
The oil contains anti-oxidants, high levels of Vitamin E that helps protect against free-radical damage.
The other qualities of the oil, no trans fats, no cholesterol, lower fat absorption, balanced fat and fewer calorie goodness makes it a heart healthy oil.  The oil has a long shelf life without chemical preservatives.  
This Alfa One Rice Bran oil is #1 in New Zealand, and now available in Canadian stores.  It is sold in 500ml or 1L containers.

There are some delicious recipes in Alfa One Recipe page, I chose this famous Chocolate Mug cake to make by adapting the recipe from the site.
4 tbsp flour
1/8 tsp baking powder
1/8 tsp salt
4 tbsp vanilla flavoured sugar
2 tbsp cocoa
1 egg*
3 tbsp milk
3 tbsp Alfa One Rice Bran Oil

Mix the wet ingredients with a fork in a microwave safe mug then add the dry ingredients slowly and mix well.  Place the mug in a microwave safe plate and cook for 1 1/2 to 2 minutes**.  Even if you see the cake rising to the top don't open the microwave.

*The egg can be omitted the cake might be a little more on the brownie fudgy side.
**I put the cake for 2 minutes, after it came out let it cool.  If you microwave too much it will burn.  In most microwaves 1 1/2 to 2 minutes is enough.


All rights reserved on photographs and written content Torviewtoronto © 2012 unless mentioned. Please Ask First